Take Apart that Giant Case: A Compact, 1.5kg Thunderbolt3 eGPU Setup
Contents
A Thunderbolt 3 external GPU setup that doesn’t weigh 7 pounds (3kg)? Is it even possible? Of course it is, but you’ll need to do some simple tinkering. This post describes how you can do it in a couple of hours if you’re so inclined. You too can loose 4lbs off your Thunderbolt 3 eGPU within a day!
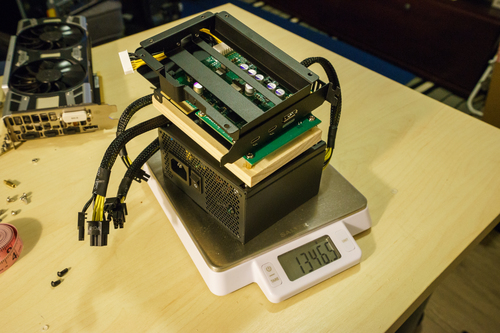
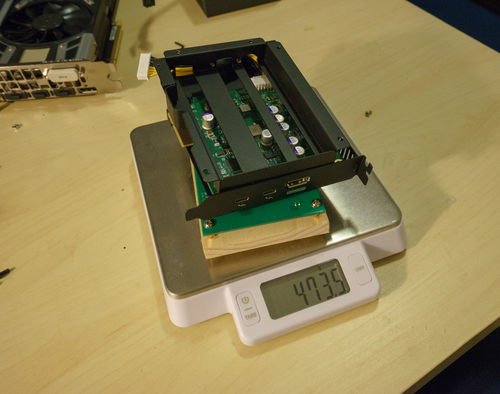
This is a Thunderbolt3-enabled DIY setup based on the Thunderbolt3-enabled components sourced from Akitio Node Pro (this and other Amazon links are affilliate). This is not the first of its kind. Here’s an example from Dec 2016 linked to me on reddit. And there are many other well-known DIY setups for pre-TB3 tech [1] [2]. My setup weighs 1.5kg including the power supply, and only 0.47kg without one, and it can fit larger video cards.
This setup does not aim to save money, but to achieve superior portability, utilizing Thunderbolt3’s plug-and-play capabilities as well as keeping it light and small. It cost about $400, but at least it doesn’t needs its separate suitcase now!
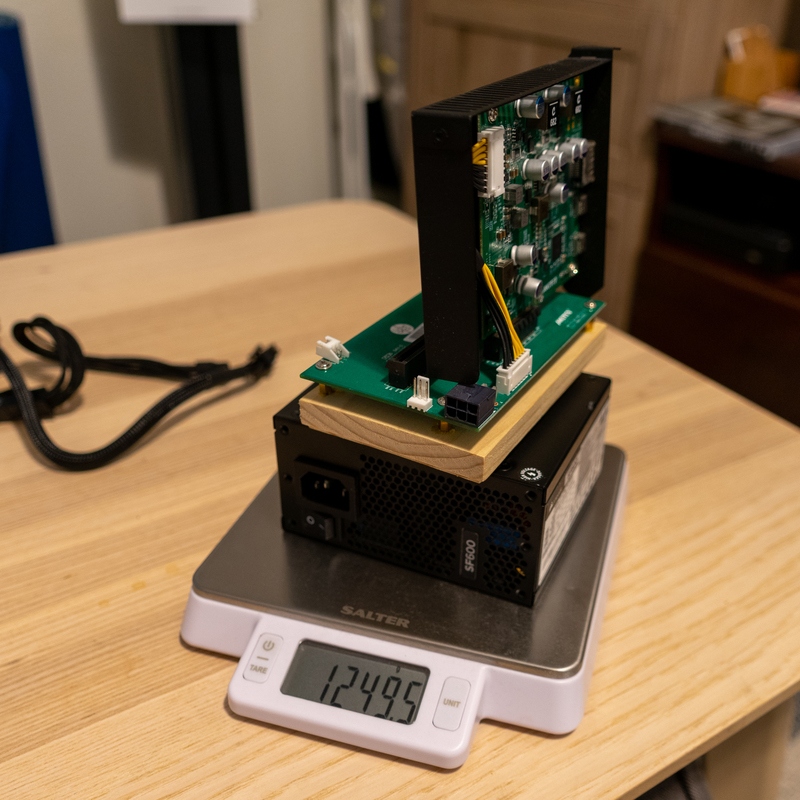
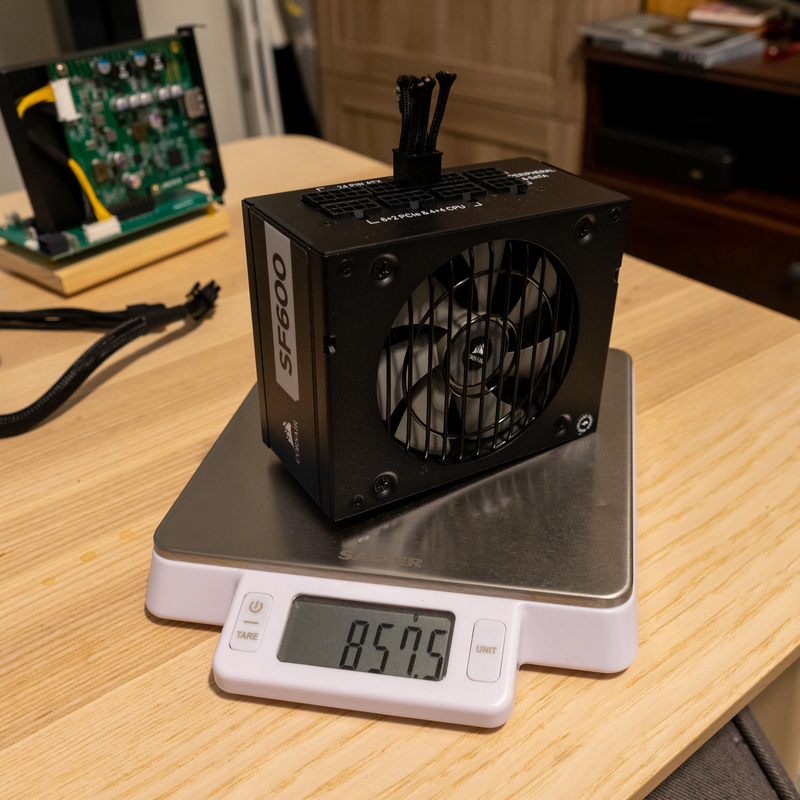
Shortly after assembling the setup, the Akitio Node’s power supply unit I’ve extracted went bust. I’ve initially replaced it with a regular desktop PSU since that’s what my local hardware store was carrying. However, I’ve since upgraded the setup to a more compact PSU, Corsair SF600. That way, the entire setup still weighs 1.3 kg.
If you want to skip my rambling about GPUs, laptops, portability, and the good old days of the greener grass, you may scroll straight to the assembly guide, and check out more pictures with the completed setup Otherwise, read on.
And if you own a business that produces the Thunderbolt 3 enclosures, could you please pretty please just make a retail solution that weighs 2 lbs, 75% of which would be the power supply? Please?
On 4k screens, portability, and priorities
Would you believe that an employed, experienced software engineer does not own a laptop? Neither did my friends whom I told I don’t own one. Boy did it make for some awkward job interview conversations. “Let’s code something on your laptop!” and I would respond, “Oh I don’t own one,” and get this suspicious “oh really” squint.
(Answer: I just don’t.)
I finally gave in when gearing up for a vacation in my hometown. I recalled all the times I wanted to use a laptop: mostly when writing blog posts on an airplane (like this one), researching bike routes when traveling, and editing photos I’ve just taken. Many of these tasks have been mostly, but not completely replaced by smart phones (Lightroom for phones and shooting RAWs from a phone camera dealing a pretty severe blow).
I rarely need a laptop when away from a power outlet: I’m not the sort of explorer who ventures into a remote village and emerges with a 10-page magazine article. In fact, I don’t really look at the laptop that much when I travel. But when I do look at the laptop, I demand the premium experience. Many ultralight laptops offer a UHD 1980x1040 screen in exchange for the extra 2-3 hours of battery life… Please, my cell phone has more pixels! I settled on HP Spectre x360 13-inch with a 4k screen.
What a gorgeous screen it is! It is easily the best display I’ve ever owned, and probably the best display I’ve eber looked at. How to make use of this artifact (well, apart from over-processing photos in Lightroom)? Play gorgeous games with gorgeous 3D graphics. Like The Witcher 3. Or DOOM (the new one, not the 1990s classics). Or Everyone’s Gone to the Rapture‘s serene landscapes.
The problem is, for a screen this gorgeous, the Spectre’s internal video card is simply… bad. The integrated Intel UHD 620 graphics card does not believe in speed. After rendering just 1 frame of the idyllic British countryside, the video card froze for 3 seconds, refusing to render another one frame until it’s done admiring the leaves, and the shades, and the reflection. It produces less than 1 FPS at best, and its 3DMark score of 313 solidly puts it at the worst 1% of computers to attempt the test.
The test doesn’t favor the brave–who would attempt to 3dmark an integrated ultralight laptop video card?–but it does show you how bad the result is. How can we improve?
When my desktop PC’s GeForce 660 MX saw the first frame of DOOM, it was in simiar awe, confused, confronted with a task more demanding it ever had before. After struggling a bit and rendering maybe three frames, the video card decided to retire, pack its things and move to Florida, while I replaced it with the state-of-the-art-but-not-too-crazy GeForce GTX 1070. DOOM instantly became fast and fun. So the question is now obvious.
How can I connect my allmighty GeForce GTX 1070 to the Laptop?
DIY eGPUs (before Thunderbolt 3)
Turns out, tinkerers have been connecting external GPUs to laptops since forever. With time, GPUs required more and more power and space, while the possible and hence demanded laptop size shrank. The GPU power consumption trend has finally been reversed, but the laptops are going to get lighter still.
A laptop is just a PC stuffed into a small plastic case, so connecting a GPU would be just like connecting it to the desktop. Laptop manufacturers would leave a “PCI extension slot” either featured as a supported connector or at least available inside the case for the bravest to solder. There is a lot of external GPU (eGPU) do-it-yourself DIY [1] [2], [3], and out-of-the-box solutions available.
But then, Intel developed a further extension of USB-C called Thunderbolt 3. The previous USB interface generations were also named “Thunderbolt”, just the lightning was meek and the thunder unnoticed).
eGPU after Thunderbolt 3
Thunderbolt 3 is no magic. It’s simply a standard to produce USB chips with higher wattage and throughoput… so high and fast that it allows you to connect, say, displays or even graphic cards over USB. It “merely” quadruples the throughput of the USB 3 standard, and now you can do plug-and-play for your video card, eh? You would just buy a thing to plug your video card into, and connect that thing into USB. Easy!
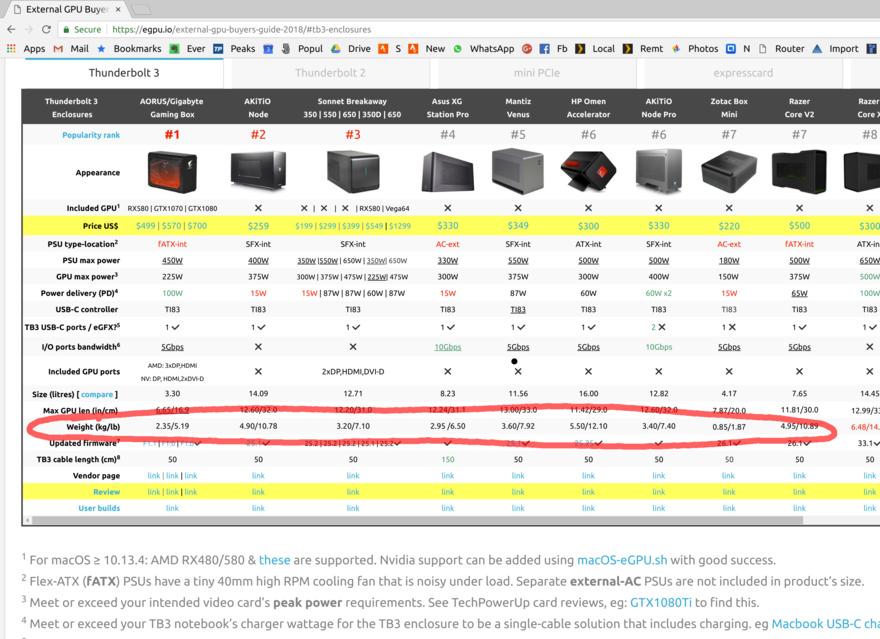
So all I need is to buy that “thing”. Easy! There’s a plenty of Thunderbolt 3 “things”, here, take a look:
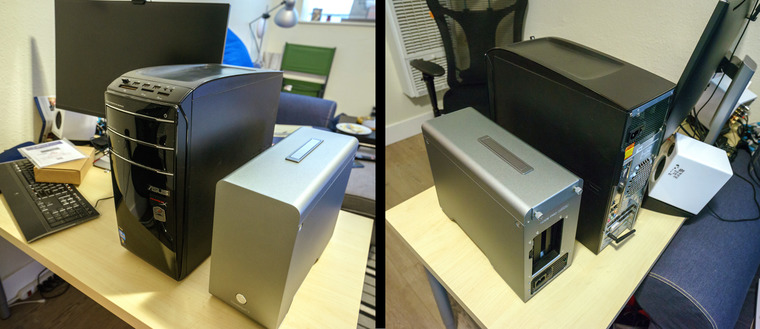
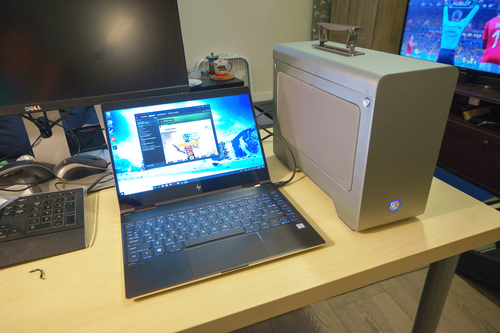
Notice something? That’s right, they all are freaking gigantic and weigh 3-4 times more than the ultralight laptop itself. Here, I bought one, and it’s a size of an actual desktop computer I own!
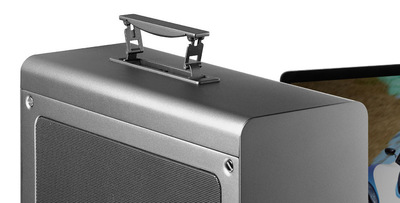
The manufacturers are telling: “want Thunderbolt 3? Buy a 3 kg case!” Look Akitio Node Pro has a freaking handle! A handle!
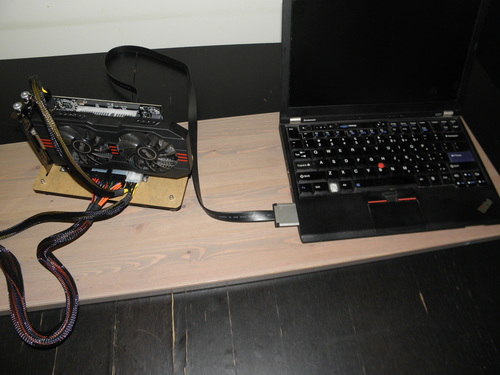
It didn’t use to be this way. Before Thunderbolt 3 enabled plug-and-play, hackers still found ways to attach an eGPU as shown above. These solutions are tiny and they cost pennies! How do we get something similar with Thunderbolt 3?
My other choice here would be a smaller-sized external GPUs like Breakaway Puck, which is indeed both smaller and cheaper. I decided against those as I would have to buy a new GPU that was less powerful than the GPU I already own. Besides, the power supplies included with those are lackluster, citing portability concerns, but they under-deliver still.
On top of that, the total weight would still be more than 1 kg, but the build would deliver significantly less power than their 1.5 lbs counterparts. The bigger enclosures have enough power to both charge the laptop and supply the GPU with enough wattage to churn those FPS.
Some speculate Intel just takes a pretty big cut in the licensing fees for every Thunderbolt 3 device produced. Since they say it on the internet, it must be true. (See also here, scroll to the middle.) This explains the $200+ price. But that does not explain the 7 lbs of scrap.
It’s time to take the matter into my own hands.
“When There’s Nothing Left to Take Away”
…perfection is finally attained not when there is no longer anything to add, but when there is no longer anything to take away. Quote: “Terre des Hommes” via wikiquote. – Antoine de Saint Exupéry
So we’re going to turn this
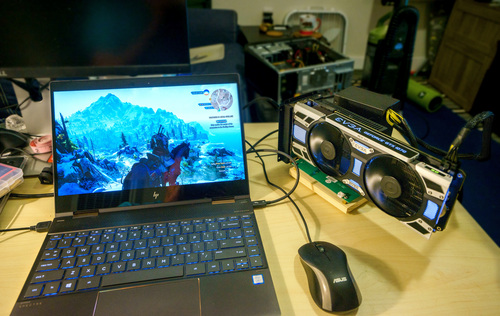
into this
The procedure consists of two steps: disassembling the original box, and mounting of the enclosure onto a chunk of wood. Before we start, please understand the risks of this procedure, and accept the full responsibiltiy for the results.
Tinkering with the device in a manner described in this post will definitely void your warranty, and putting a source of heat next to a piece of wood is likely a fire hazard. Do not attempt unless you know what you’re doing.
We’ll need the following ingridients:
- Akitio Node Pro (to source the TB3 extension cards) (amazon);
- T10 and T8 screwdrivers (to disassemble the case) (see the pic, and sample product);
- Set of M3 standoffs (at least half an inch tall); we’ll recycle the matching screws from the original assembly (amazon);
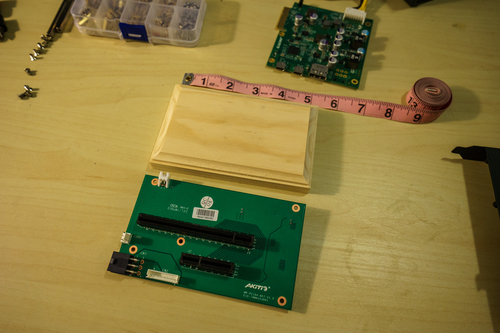
- Chunk of wood at least 3x5 inches (to mount the assembly onto) (amazon);
- Drill or some other way to make deep holes in the said wood;
- Super Glue (or some other glue to stick metal to wood)
A note on choosing the enclosure
The enclosure used here was Akitio Node Pro. I mostly chose it for these reasons:
- a compact 500W power supply. I found the reports of its noisiness unwarranted, but I was a bit unlucky with it.
- existing evidence it’s ieasy to take apart
- a proven record of its compatibility with GTX 1070.
- powerful enough to also charge the laptop (unlike, say, the non-“Pro” Akitio Node)! I can confirm it does. You should shoot for 450-500W+ for that: the laptop charger would draw 100W, and you can look it up in the reviews.
- … and last but not least it actually scored well in the reviews (see also the comparison).
Taking the case apart
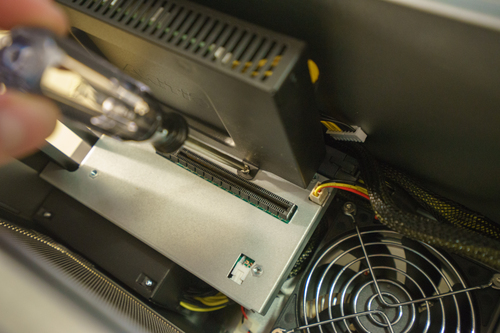
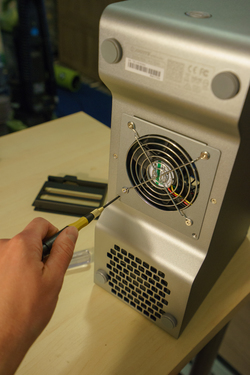
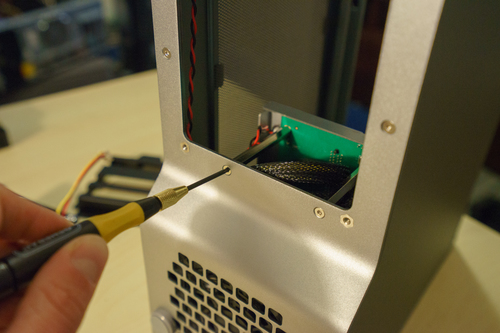
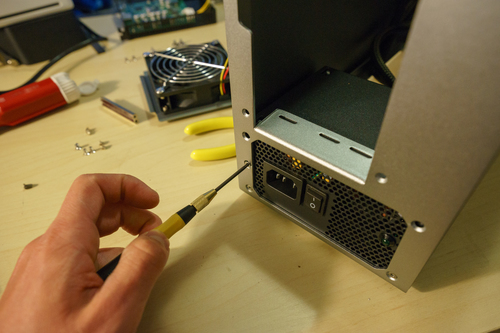
It was somewhat straightforward to disassemble the box. I needed T8 and T10 screws as well as the expected Phillips screw. I got T8 and T10 from ACE Hardware brick-and-mortar stores. If you’re curious, hex screwdrivers and flat screwdrivers only got me so far, until I faces a Boss Screw, a T10 right next to a board. That’s when I gave up and went to the hardware store:
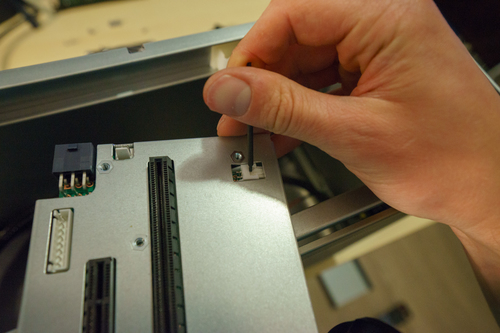
Basically, just unscrew every bolt you can see, remove the part if you can; then find more screws and repeat.
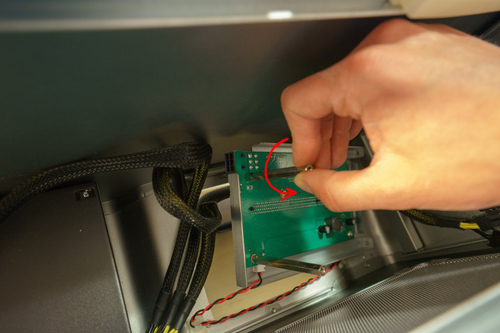
This bit is tricky: you need to unplug this wire; I couldn’t find more ways to unscrew anything else, so I just extracted this using a thin Allen key.
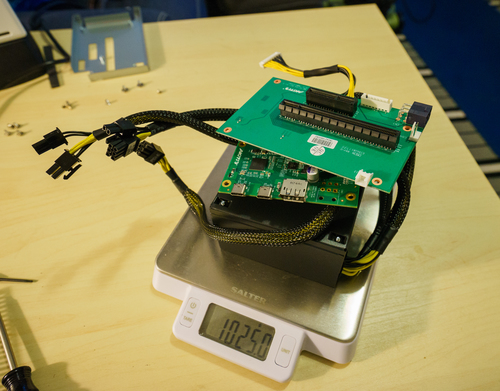
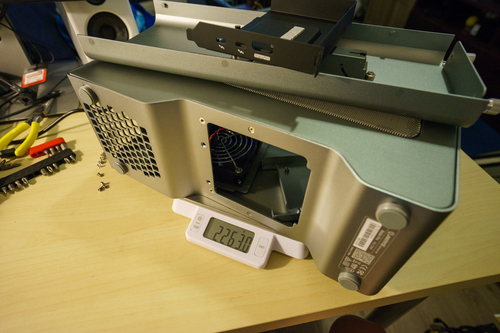
What we need is these three parts: two boards (one with the PCI slots and the other with the USB ports), and the power supply. Look, they weigh only 1kg, as opposed to other, non-essential parts that weigh 2.3kg.
Putting it back together (without the scrap)
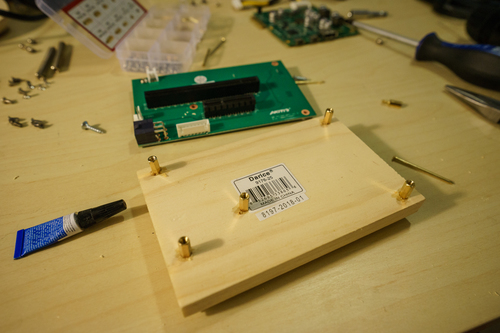
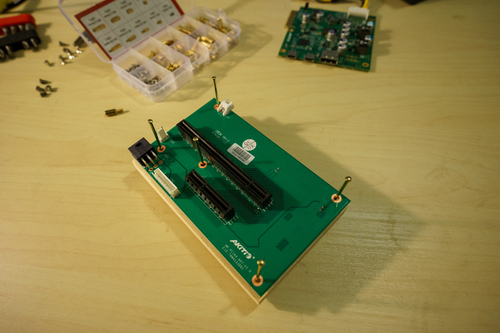
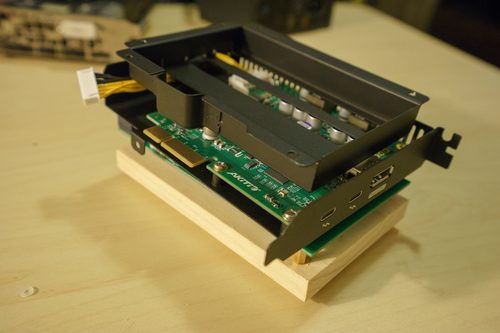
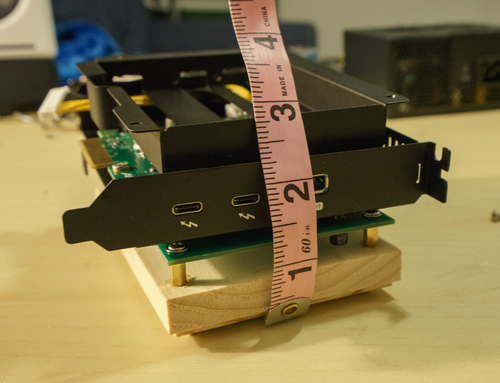
The bottom board, once dismounted, reveals that it can’t stand on its own and needs to be mounted on at least 1cm standoffs. I decided to mount them onto a wooden board that needs to be at least 3x5. This board set worked, albeit it only had 1 out of 5 boards that was rectangular (it fits pretty snug so you only have one chance).
Wait, how did I know where to put those, and how did I secure them? Simple: I drilled the wood and glued the standoffs. I first tried to mark the spots to drill by putting nails through the mount holes like so:
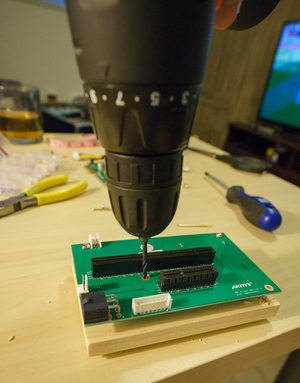
This did not work! I wasn’t able to put the nails in straight enough, and missed the correct spot for a millimeter or so. I fixed it by tilting one of the standoffs a bit, but I did resort to a different method of marking the holes: drilling right through the board!
This looked sketchy but it worked better than trying to hammer nails vertically.
I used super glue to secure the standoffs to the wood. As added security, I put a bit of saw dust back into the holes for a tighter grip. (Ask Alex for the right way. Some mention epoxy glue but then my dad said its unsuitable for gluing wood to metal, so I didn’t research this question further (and I surely didn’t have it and I didn’t want to go to the hardware store again).
I practiced to mount standoffs onto a different board first, and I highly recommend you do this too. I only had one board at the time, so I couldn’t screw it up, but if you just get more boards, it’d be easier.
Finishing touches and results
After I plugged the cards, the setup seemed a bit unstable. After all, that is a heavy double-slot monster of a GPU. So I added back one of the assembly pieces previously discarded and secured it back with a screw I found. However, I also later lost that screw while on the road, and ran this for hours without the extra piece, and it worked well, and didn’t fall over (duh).
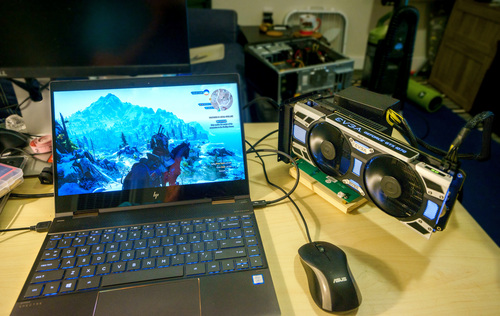
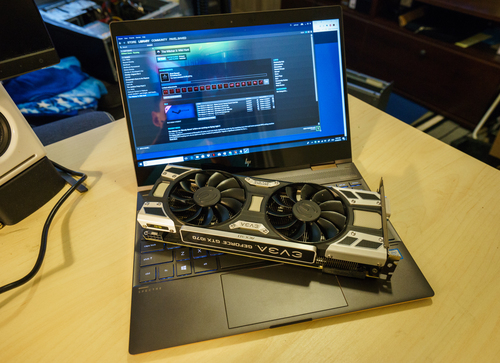
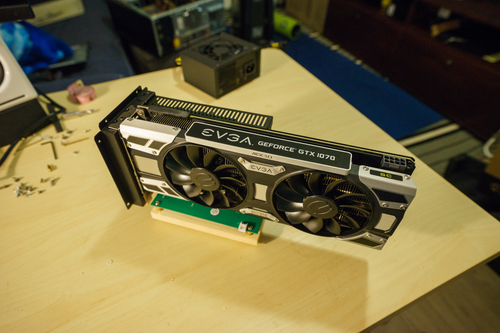
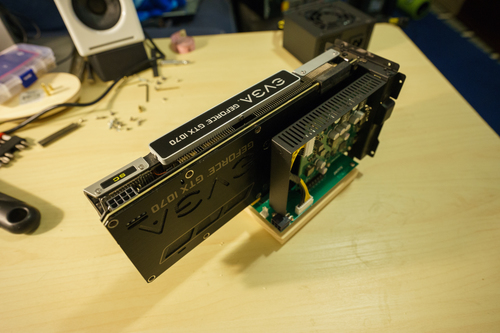
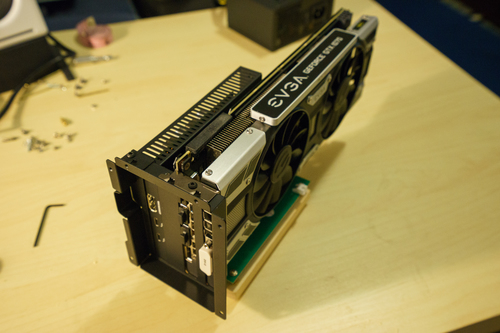
So here it is (without the power supply)
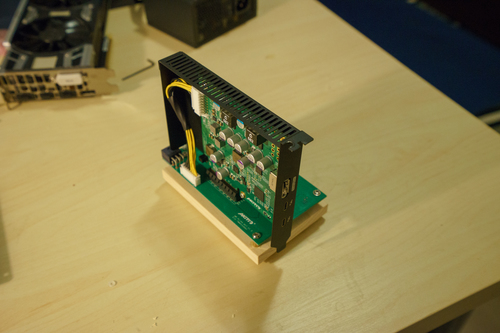
And here it is without the GPU (and without the power supply either)
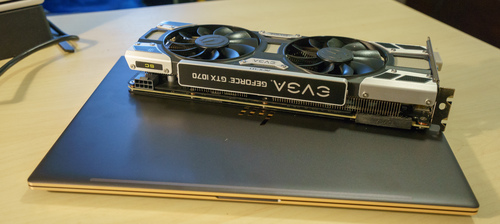
The final setup weighs just 1.3 kg, including the power supply and 0.47kg without.
In order to improve portability, I only used the X screws when putting things back, and made sure that no T8 or T10 screws are needed, and I can travel with a regular philips screwdriver. Make sure to pick a large enough screwdriver to unscrew that tricky bolt. I tried to use a small screwdriver one might use for watches and I didn’t get enough torque out of it.
Benchmarks
And we’re done. I’ve ran a variety of tests and benchmarks. Note that I ran all benchmarks with the internal display.
3Dmark Time Spy
I ran a 3Dmark Time Spy benchmark multiple times; here are the scores from one run. I also ran it on my PC (same GPU, but a different, older CPU) to check if switching from PC to a Laptop
| Test | Score | Percentile | Verdict | Link |
|---|---|---|---|---|
| Laptop no eGPU | 313 | bottom 1% |  |
https://www.3dmark.com/3dm/27403962 |
| Laptop with eGPU | 3984 | better than 40% | top gaming laptop | https://www.3dmark.com/3dm/27403805 |
| Desktop same GPU | 5259 | better than 47% | what? time to upgrade | https://www.3dmark.com/3dm/27733262 |
My desktop runs Intel(R) Core(TM) i7-3770, whereas the laptop runs way more modern Core i7-8550U. However, it’s known that CPUs didn’t make much progress in single-core performance over the last several years; most improvements have been in portability and energy efficiency.
Unfortunately, I didn’t use 3dMark Pro, so I couldn’t force 4k for the desktop; it ran under a lower resolution. I suspect, they’d be on par otherwise.
So it seems that the eGPU setup runs as well as the desktop setup with the same GPU (but a way older CPU).
Cuda-Z
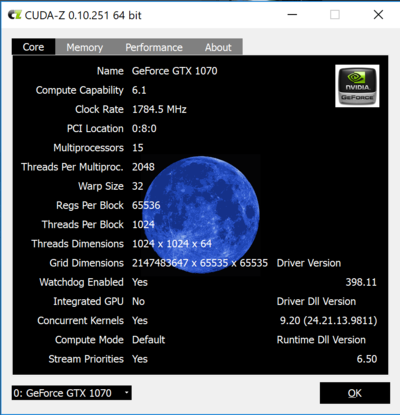
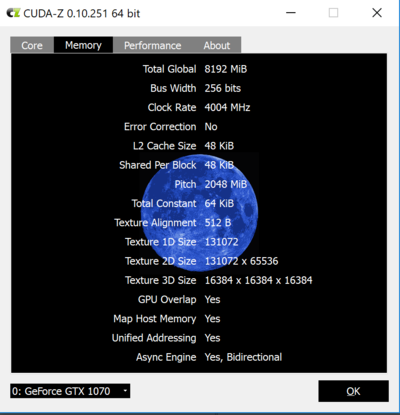
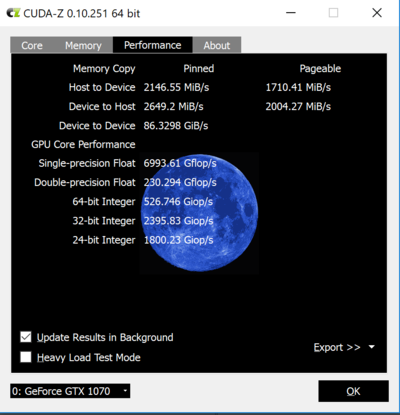
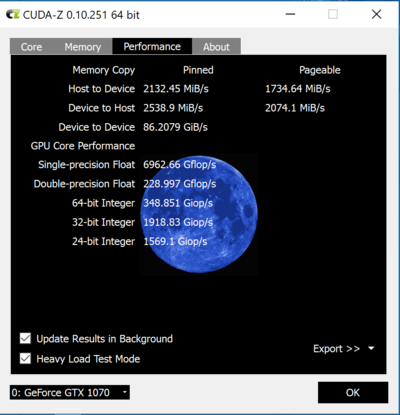
I used Cuda-Z software recommended by egpu.io to measure throughput.
It seems, the connection does churn 2Gb/s of data each way, which is good. Overall, I don’t really know how ti interpret the results.
Games
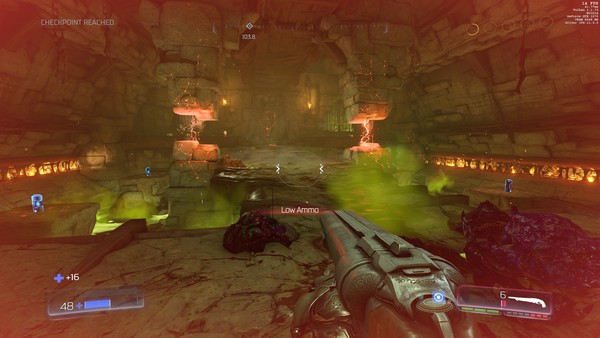
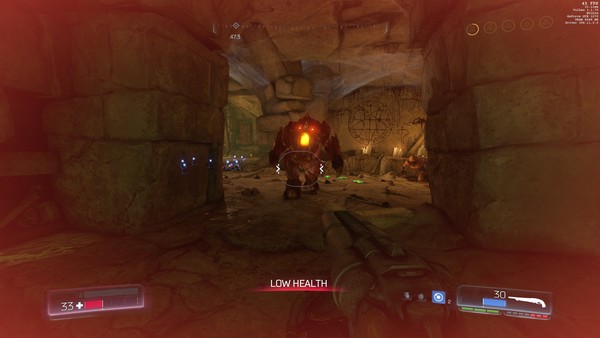
I’ve playes many hours of Witcher 3 (2015) on max settings to great effect. There was no lag, and I enjoyed beautiful and responsive gateway. I also played a bit of DOOM (2016) on Ultra settings, and it was a bit too much (I got 20-30 FPS when walking and most of the fights, but several simultaneous effects lagged a bit). Non-ultra settings were a blast though!
Both games were enjoyed in 4k resolution. It was awesome.
Portability and features
The laptop charges while playing; just make sure to get a 100W-enabled cable.
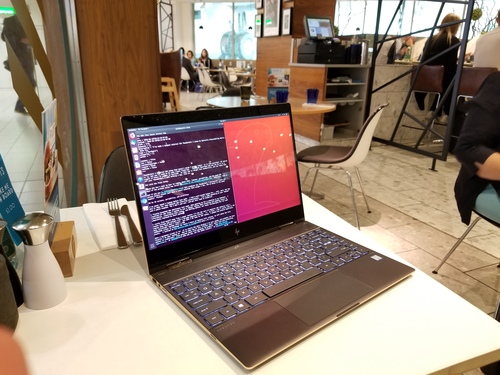
As an added bonus, Ubuntu Linux 18.04 (bionic) recognized the plugged in video card without any issues or configuration. I haven’t yet tested Machine Learning acceleration but I’ll update this post when I can do it.
Field Test Number one… oops!
How does this setup fare without benchmarks? I was able to get several hours of continous gameplay until the stock Akitio’s power supply died of overheading and never recovered. The boards, the GPU, and the laptop were OK, but the power supply just stopped working.
I can’t quite tell what prompted it, but I did notice that the fan didn’t turn on. It used to but it didn’t. I must have damaged the unit when transporting it in the checked in luggage (or maybe it was just garbage to begin with).
Common ATX Power Supply Replacement
This section is probably not interesting to you as I’m unsure your power supply will blow up. So please skip to the final Field Test section.
Instead of trying to recover, debug, and fix the dead power supply, I just bought a new one. I immediately noticed the difference between the Akitio’s power supply and the typical ATX power unit.
- Akitio’s Power Supply is smaller than many standard ATX units and it weighs less (0.8 kg vs 1.5kg)
- …it only has PCI-E cords whereas ATX has all of them
- …it has two PCI-E power connectors, but they are on different wires. The ATX power supply I got has two of them attached to the same wire, and the distance between them is quite short!
- …it turns on when the switch on the back is flipped, whereas a normal ATX power supply requires another switch to power-up, which motherboards usually supply but we don’t yet have.
In 2018, when the post was originally written, I’ve replaced the original PSU with a Corsair 550W modular supply RM550x which I wouldn’t do now. Its main feature was modular wiring so that the extra wires could be discarded, and that’s what it looked like.
Later, I’ve purchased a more compact Corsair SF600 that weighs half as much as RM550x, and is thus similar to the original Akitio PSU. The entire setup is now back to 1.3 kg again.
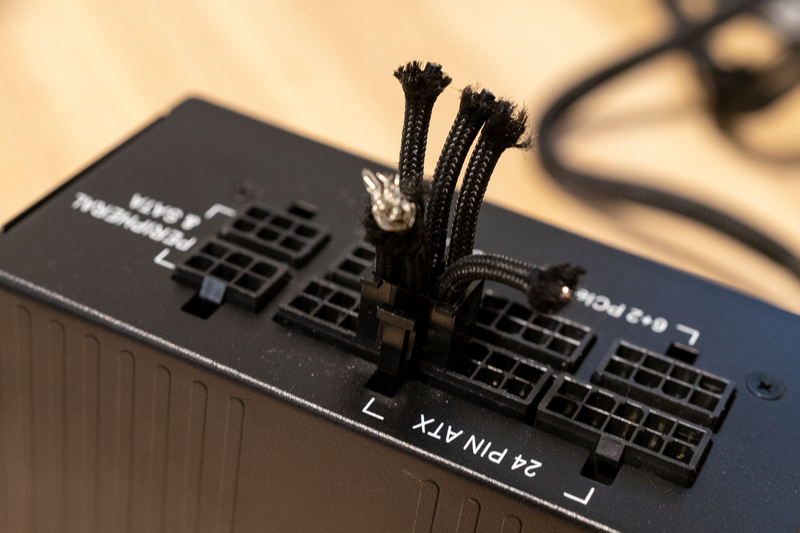
Since the ATX power supply requires the user to press a power-on button, you need to emulate it as if it’s always pressed. You do this by short-circuiting the pins that are normally connected to the power on button via the motherboard. That way, the PSU will start powering the GPU when you press the on/off switch on the PSU itself.
I googled the pin layout for my PSU, cut the wires from one of the spare connectors and short-circuited the power on pins like so:
This plug simply sits there at all times; there’s no need to unplug or replug it. Also, the pin shapes didn’t exactly match, but with enough force, any connector can be plugged into any slot 🤓.
When byuing the ATX power supply, consider picking up a PCI-E extender along the way. You’ll need to connect the PCI-E power to both the GPU itself and the Akitio’s “motherboard” piece (it uses 6-pins).
Most likely, the dual PCI-E connectors are designed for two video cards placed rigth next to one another, whereas about 10-15 inch long wire is needed for our setup. Alternatively, you can use two wires and connect the GPU and the “motherboard” separately, but this will add clutter. In my setup with the Corsair SF600, I did indeed use an extender.
You might need or could use a splitter instead as well.
Wi-fi Interference testing
I heard, the major reason Thunderbolt 3 eGPUs come with a huge enclosure is to prevent the electromagnetic field emissions. Supposedly, Thunderbolt 3 boards emit quite a bit of EMF radiation, and this can cause Wi-fi interference.
I wasn’t able to find the evidence of that. I measured wi-fi connectivity speeds and signal strength and I wasn’t able to notice a drop. That doesn’t mean there was no packet drop: perhaps, the wi-fi connection was indeed broken, but my 100Mb/s broadband was too slow to actually affect the speeds. It also could be that you’d need say 5 Thunderbolt 3 cards to emit enough EMF.
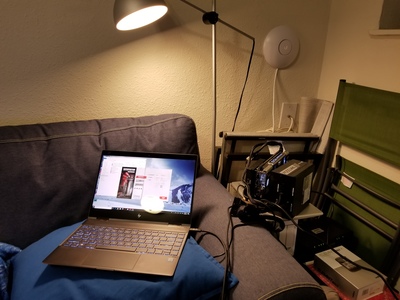
I used my cell phone to measure signal strength and used OOKLA speedtest to measure up- and download speeds. I placed cell phone into three places: 2ft from Wi-fi router, 12 ft from Wi-fi router, and into the other room. I also placed eGPU into three positions: 2ft from Wi-fi router, 10 ft from Wi-fi router, and completely off. Here’s what it looked like when the eGPU is 2ft away from Wi-fi; you can see the Ubiquiti wi-fi “White Plate” in the top right corner:
I was running the Unigine Superposition benchmarks while measuring the signal strength and the download speeds, in case the EMF interference only appears under load.
Science log is here. The results are in the table below, each cell contains “Download speed (Mb/s) / Upload Speed (Mb/s) / Signal Strength (db)".
| Phone position | eGPU off | eGPU 10ft away | eGPU 2ft Away |
|---|---|---|---|
| 2ft away | 114 / 14.0 / -31 | 114 / 12.8 / -22 | 116 / 13.3 / -22 |
| 10 ft away | 118 / 14.2 / -38 | 119 / 13.1 / -34 | 116 / 13.4 / -35 |
| Other Room | 110 / 13.8 / -53 | 116 / 13.8 / -49 | 116 / 13.6 / -54 |
So this means my Wi-fi stays pretty much unaffected regardless of eGPU presence. If there was packet drop, it didn’t affect the 100 Mb/s connection.
Optional Addons
Buy a longer USB3 Thunderbolt-enabled cable ⚡
The USB cable that comes with the Akitio Node Pro is quite good but a bit too short. No wonder: a longer cable will cost you. A detachable cable that affords the required throughput needs to conform to som Thunderbolt 3 standard, and support 40Gbps data throughput. I simply bought a pretty long, 6ft cable by Akitio hoping for best compatibility, and I’ve had no issues with it. The Field Tests were done on that longer cable.
Putting the enclosure away reduces noise and improves mobility: you can put the setup close to the power outlet and attach to it from a different side of the table.
Use that extra fan
Akitio Node Pro had one extra fan to draw air into the case, and it is now unused.
Optionally, you can attach it to the board where it originally was. If I were to do this, I would also screw some leftover standoffs into the fan so it gets better intake. The original case had a curve to separate it from the ground. However, I got good enough performance out of the video card.
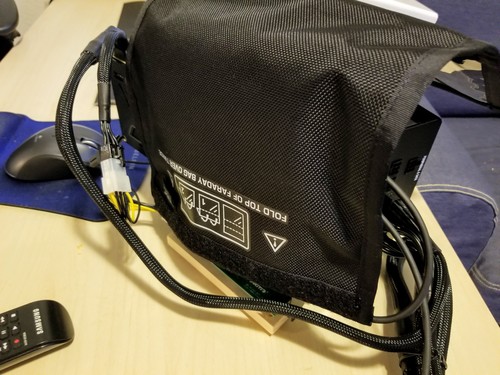
Faraday Bag
A way to reduce EMF exposure is to put the emitter into a Faraday Cage or a special bag.
This one actually works. As probably do others, but just a month ago there used to be many scams on Amazon of faraday cages that you should place on top of your router, and they would “block EMF”, improve your health, and make Wi-fi faster at the same time. 😂 This Farady bag actually works (I tested it by placing a cell phone and calling it to no avail). I can’t tell you have to use it, but maybe it could put your mind at ease.
Final Evaluation and notes on performance
It works. Moreover, the power supply doesn’t overheat. I have never seen its fan turn on. Perhaps, the larger size allowed to space the internals better, or perhaps it’s just of better quality.
The performance is stellar, even with the internal display. Various measurements (done by other people) detect that using the internal display on a laptop or connecting an external display to the laptop (as opposed to connecting it to the video card itself) saturates some bottleneck and results in a performance drop. My findings are consistent with this blog post on egpu.io: with a card like GTX 1070, you won’t notice the drop because you’re getting 40+ FPS anyway.
After playing Witcher 3 at “Ultra High” quality (!), with full-screen antialiasing (!!), at 4k resolution (!!!), for several hours (was hard to resist anyway), I am happy to call it a success.
Moreover, the setup survived a transcontinental flight in the checked-in luggage, wrapped in underwear and padded with socks. And now, just one challenge remains: get it through TSA in a carry-on and prove the bunch of wires is a gaming device.
